GitLab Runner is a fantastic tool that works like a trusty helper for developers. It takes care of tasks that ensure your software runs smoothly, like testing and deploying. Installing GitLab Runner on your Ubuntu system is like giving yourself a superpower in software development. Automating many repetitive tasks makes your life easier, allowing you to focus on what you do best: writing code.
In this guide, we'll walk through the steps to get GitLab Runner up and running on your Ubuntu 20.04 LTS system. You don't need to be a computer expert to follow along; just have your Ubuntu machine ready, an internet connection, and a cup of coffee if you like.
Table of Content
- Prerequisites
- Step-By-Step Guide to Install Install GitLab Runner on Ubuntu
- Step 1: Update Ubuntu Packages
- Step 2: Add the GitLab Runner Repository
- Step 3: Install GitLab Runner on Ubuntu 20.04 LTS
- Step 4: Register GitLab Runner
- Step 5: Start and Enable its Service
- Step 6: Verify Runner Status
- Uninstallation (optional)
- Conclusion
- Install GitLab Runner on Ubuntu - FAQs
Prerequisites
Before we start, make sure you have:
- Permission to make changes on your Ubuntu computer.
- Access to the internet.
- A GitLab account.
Step-By-Step Guide to Install Install GitLab Runner on Ubuntu
Step 1: Update Ubuntu Packages
First things first, let's make sure our system is up-to-date. Open your terminal and type:
sudo apt update && sudo apt upgradeStep 2: Add the GitLab Runner Repository
GitLab Runner isn't included in the usual list of software for Ubuntu. We need to add its special place called a repository.
Install Dependencies
We need to install something called curl to help us with the installation. If you don't have it, type:
sudo apt install -y curl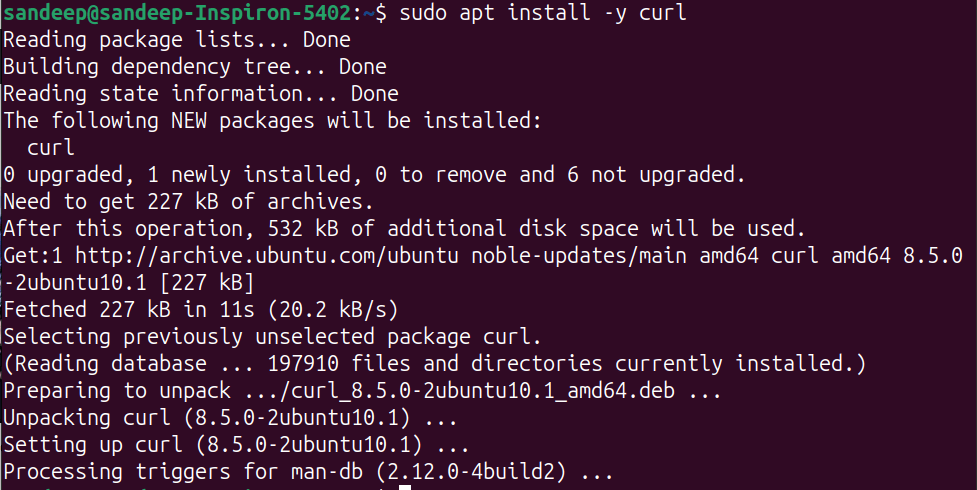
Add the Repository
Now, let's add the GitLab Runner's repository by running this command:
curl -L https://packages.gitlab.com/install/repositories/runner/gitlab-runner/script.deb.sh | sudo bash
Step 3: Install GitLab Runner on Ubuntu 20.04 LTS
With the repository added, let's install GitLab Runner. Type:
sudo apt install gitlab-runner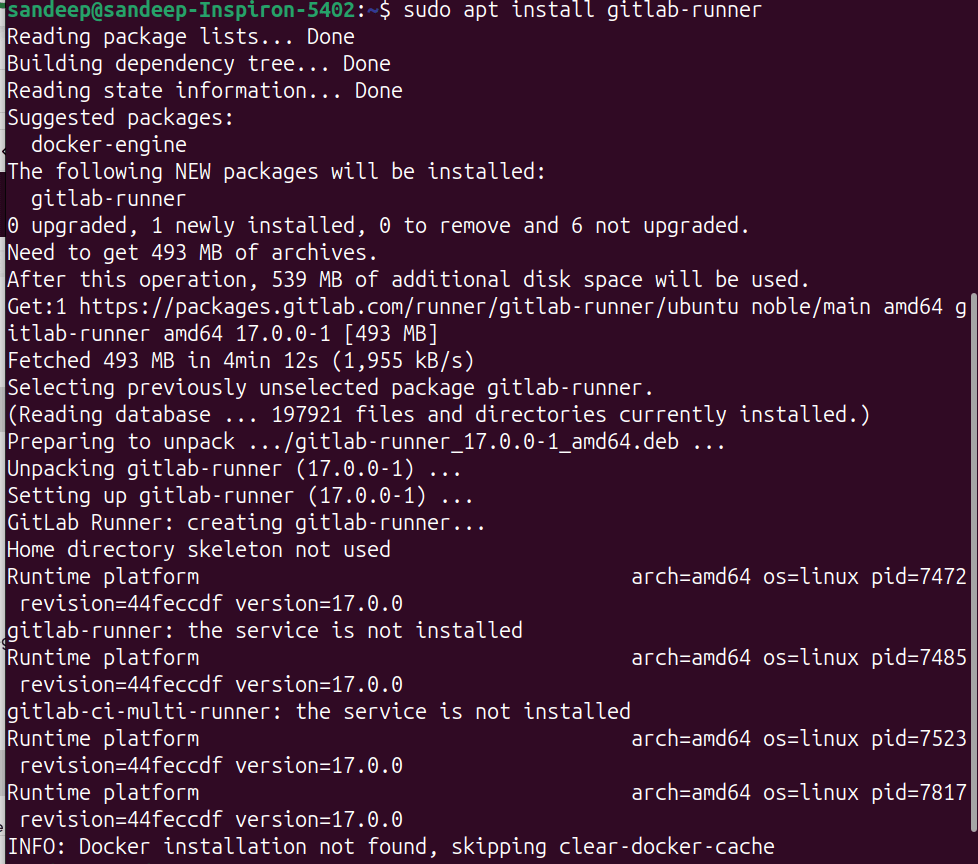
Step 4: Register GitLab Runner
Now, we need to tell GitLab Runner about our GitLab account.
Get Your GitLab Registration Token
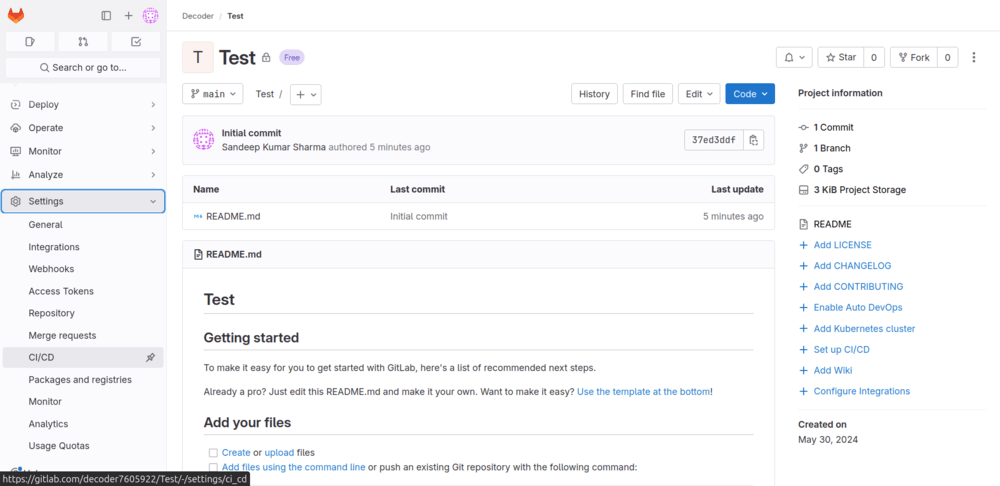
Go to your project on the GitLab website, click on Settings > CI/CD, and copy the registration token.

Register the GitLab Runner
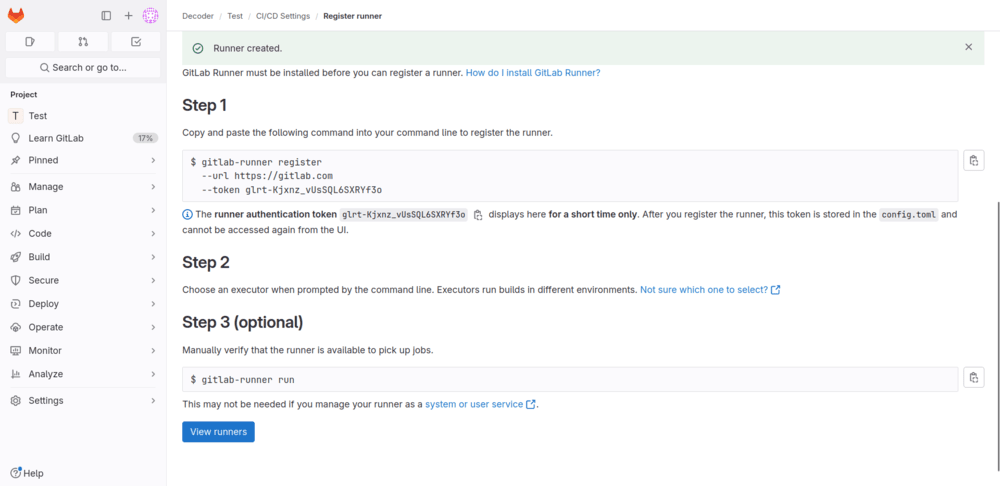
Back in your terminal, type:
sudo gitlab-runner register.png)
Follow the instructions. You'll need to paste your registration token and give a name to your Runner.
Step 5: Start and Enable its Service
Let's make sure GitLab Runner is running and starts automatically when we boot our computer.
Start the service:
sudo gitlab-runner startEnable auto-start:
sudo gitlab-runner enableStep 6: Verify Runner Status
To check if GitLab Runner is up and running, type:
sudo gitlab-runner verify
You should see a message saying it's valid, which means it's ready to work.
Uninstallation (optional)
If you want to remove GitLab Runner, here's how:
sudo gitlab-runner stopsudo apt autoremove --purge gitlab-runnersudo rm -rf /etc/apt/sources.list.d/runner_gitlab-runner.listsudo deluser --remove-home gitlab-runnersudo rm -rf /etc/gitlab-runnerConclusion
That's it! Now you have GitLab Runner on your Ubuntu system is like having a reliable assistant by your side throughout your software development journey. By automating various tasks in continuous integration and deployment, GitLab Runner streamlines your workflow, saving you time and effort. With GitLab Runner in place, you can focus more on writing quality code and less on manual processes.
