


📌 学习目标
- 掌握获取鼠标下的要素的实现方法
- 理解相关API的使用
- 能够独立完成类似功能开发
MapLibre GL JS 从入门到精通 - 130+实战案例
🎯 核心概念
获取鼠标指针下的要素。
💻 完 整 代 码
代码示例
const map = new maplibregl.Map({
    container: 'map',
    style: 'https://tiles.openfreemap.org/styles/bright',
    center: [-96, 37.8],
    zoom: 3
});

map.on('mousemove', (e) => {
    const features = map.queryRenderedFeatures(e.point);

    // 为了可读性和性能,限制显示的属性数量
    const displayProperties = [
        'type',
        'properties',
        'id',
        'layer',
        'source',
        'sourceLayer',
        'state'
    ];

    const displayFeatures = features.map((feat) => {
        const displayFeat = {};
        displayProperties.forEach((prop) => {
            displayFeat[prop] = feat[prop];
        });
        return displayFeat;
    });

    document.getElementById('features').innerHTML = JSON.stringify(
        displayFeatures,
        null,
        2
    );
});
代码示例
<!DOCTYPE html>
<html lang="en">
<head>
    <title>Get features under the mouse pointer</title>
    <meta property="og:description" content="使用 queryRenderedFeatures 显示悬停地图要素的属性。" />
    <meta property="og:created" content="2006-06-25" />
    <meta charset='utf-8'>
    <meta name="viewport" content="width=device-width, initial-scale=1">
    <link rel='stylesheet' href='https://unpkg.com/maplibre-gl@5.24.0/dist/maplibre-gl.css' />
    <script src='https://unpkg.com/maplibre-gl@5.24.0/dist/maplibre-gl.js'></script>
    <style>
        body { margin: 0; padding: 0; }
        html, body, #map { height: 100%; }
    </style>
</head>
<body>
<style>
    #features {
        position: absolute;
        top: 0;
        right: 0;
        bottom: 0;
        width: 50%;
        overflow: auto;
        background: rgba(255, 255, 255, 0.8);
    }
    #map canvas {
        cursor: crosshair;
    }
</style>
<div id="map"></div>
<pre id="features"></pre>
<script>
    const map = new maplibregl.Map({
        container: 'map',
        style: 'https://tiles.openfreemap.org/styles/bright',
        center: [-96, 37.8],
        zoom: 3
    });

    map.on('mousemove', (e) => {
        const features = map.queryRenderedFeatures(e.point);

        // 为了可读性和性能,限制显示的属性数量
        const displayProperties = [
            'type',
            'properties',
            'id',
            'layer',
            'source',
            'sourceLayer',
            'state'
        ];

        const displayFeatures = features.map((feat) => {
            const displayFeat = {};
            displayProperties.forEach((prop) => {
                displayFeat[prop] = feat[prop];
            });
            return displayFeat;
        });

        document.getElementById('features').innerHTML = JSON.stringify(
            displayFeatures,
            null,
            2
        );
    });
</script>
</body>
</html>
🔍 代码解析
1. 初始化地图
使用 new maplibregl.Map() 创建地图实例,配置美国区域作为初始视图。
2. 关键配置项
- map.queryRenderedFeatures(): 查询鼠标位置下的要素
- displayProperties: 定义要显示的属性列表
- JSON.stringify(): 将要素信息格式化为JSON字符串显示
⚙️ 参数说明
| 参数 | 类型 | 必填 | 说明 |
|---|---|---|---|
| point | [number, number] | 是 | 屏幕坐标 [x, y] |
| options.layers | string[] | 否 | 只查询指定图层 |
🎨 效果说明
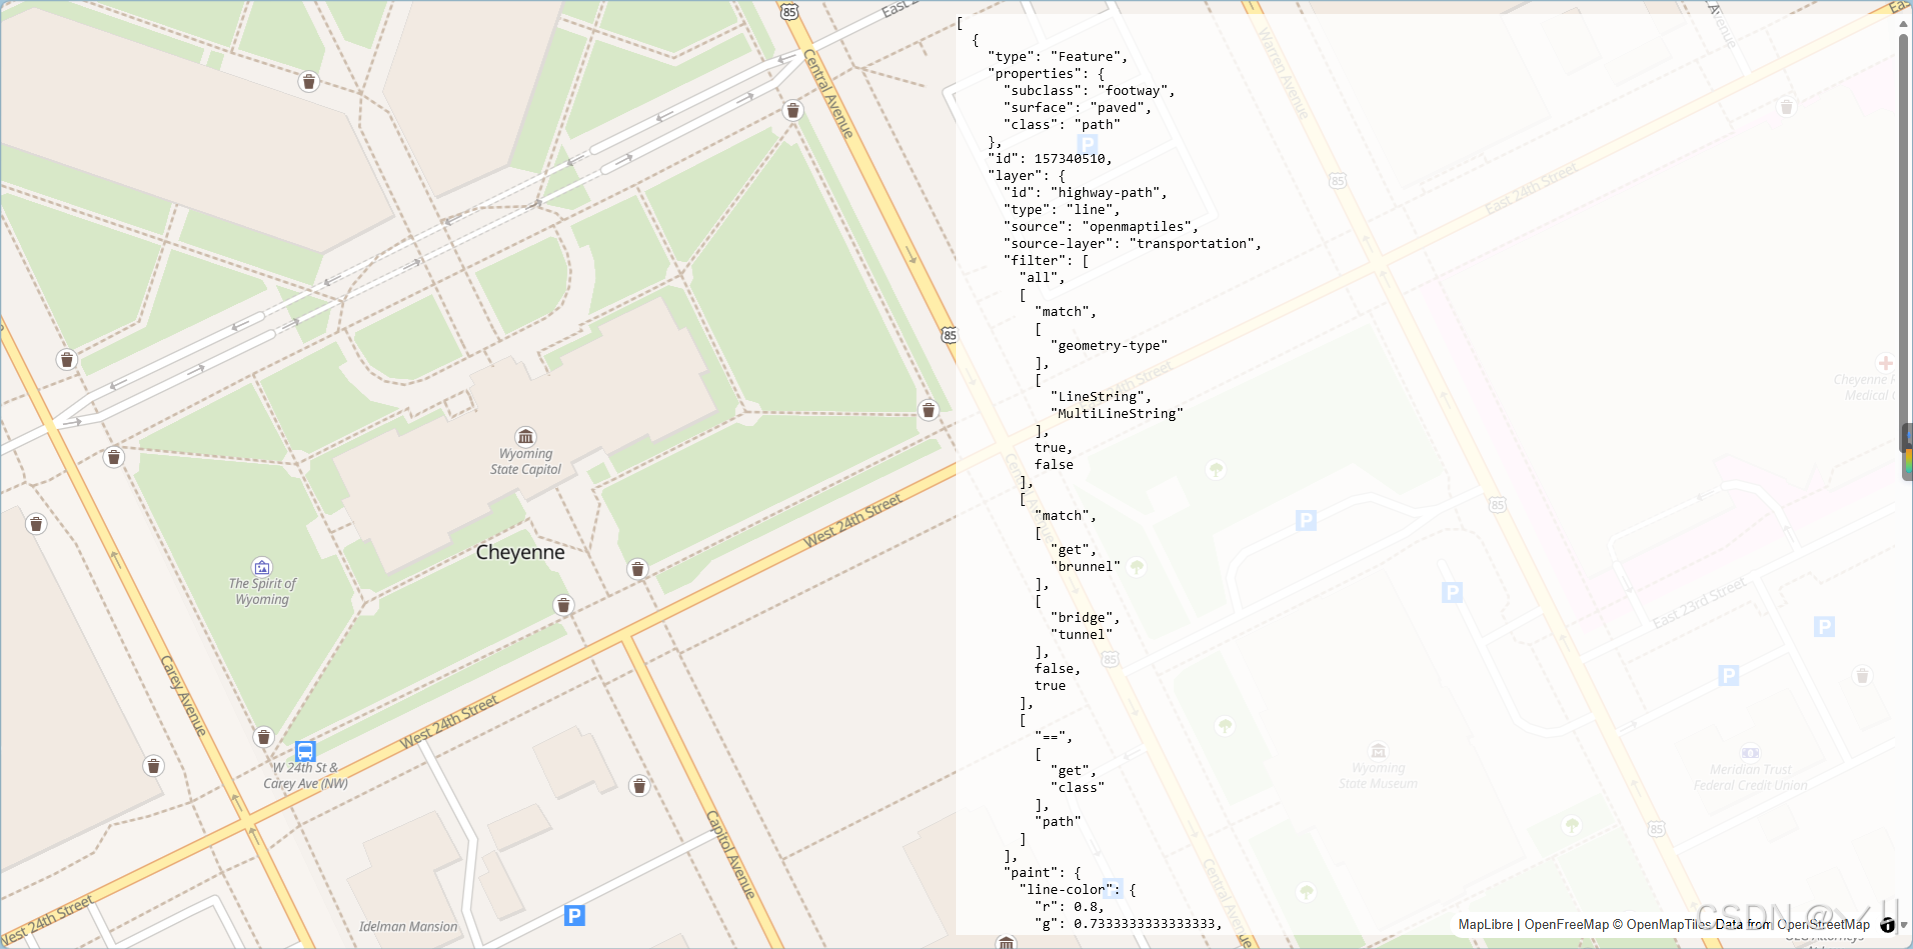
运行代码后,地图显示美国区域。鼠标在地图上移动时,右侧面板会实时显示鼠标位置下的所有要素信息,包括类型、属性、所属图层、来源等。
💡 常 见 问 题
Q1: 查询结果为空?
A: 检查以下几点:
- 确认鼠标位置确实在要素上
- 检查options.layers过滤条件是否正确
- 确认图层是否可见
Q2: 如何限制只查询特定图层?
A: 使用layers选项过滤:
const features = map.queryRenderedFeatures(e.point, {
    layers: ['places', 'roads']
});
Q3: 如何只获取要素的属性?
A: 使用map.queryRenderedFeatures().map(f => f.properties)
📝 练习任务
- 基础练习:修改displayProperties显示更多属性
- 进阶挑战:添加图层筛选器,只显示特定图层信息
- 拓展思考:如何实现点击获取要素信息?
- 综合实践:创建一个要素信息调试工具
🌟 最佳实践
- 性能优化: 限制显示的属性数量,避免频繁DOM操作
- 调试友好: 格式化JSON输出便于阅读
- 交互设计: 区分鼠标样式便于用户理解
- 开发辅助: 用于检查图层数据和属性结构
- 无障碍: 考虑为屏幕阅读器提供替代方案
🔗 延伸阅读
-
[下一课预告]:将继续学习地图图层的基础知识
本文是MapLibre GL JS实践课程系列的一部分,欢迎关注收藏


 546
546

 被折叠的 条评论
为什么被折叠?
被折叠的 条评论
为什么被折叠?
 到【灌水乐园】发言


