We will learn how to create a beautiful Hero Section using Next.js and Tailwind CSS. A Hero Section is the first visual element a user sees on a website and it is very important for making a good first impression. It contains a bold headline, a call to action (CTA), and sometimes an image or video. We'll focus on developing a modern, responsive, and clean Hero Section to enhance the user experience.
Prerequisites
Approach
Set up a new Next.js project by running these commands Build a responsive Feeds UI with custom colors (primary: green, secondary: navy blue). Then we will write all the necessary components and styles. we will create only one component that will render on the screen as a Hero component that will consist of an image and some content with proper alignment.
Steps to Create & Set Up the Project
Step 1: Set up the Next.js project
Run the following command to create a new Next.js project:
npx create-next-app feeds-ui-nextjs
cd feeds-ui-nextjs
Step 2: Select the following options
Need to install the following packages:
create-next-app@14.2.15
Ok to proceed? (y) y
√ Would you like to use TypeScript? ... No / Yes
√ Would you like to use ESLint? ... No / Yes
√ Would you like to use Tailwind CSS? ... No / Yes
√ Would you like to use `src/` directory? ... No / Yes
√ Would you like to use App Router? (recommended) ... No / Yes
√ Would you like to customize the default import alias (@/*)? ... No / Yes
Step 3: Update globals.css
Create a globals.css file inside the styles folder and include Tailwind directives:
@tailwind base;
@tailwind components;
@tailwind utilities;
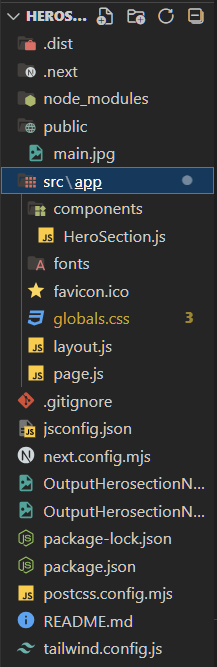
Project Structure:
Updated Dependencies:
"dependencies": {
    "next": "14.2.14",
    "react": "^18",
    "react-dom": "^18"
  },
  "devDependencies": {
    "autoprefixer": "^10.4.20",
    "postcss": "^8.4.47",
    "tailwindcss": "^3.4.13"
  }
Example: This example shows the creation of the Hero section for a website.
/* globals.css*/
@tailwind base;
@tailwind components;
@tailwind utilities;

/* Additional Styling */
.bg-gradient-to-r {
  background: linear-gradient(to right, #3b82f6, #6366f1, #4f46e5);
}

.text-white {
  color: #ffffff;
}

.text-green-300 {
  color: #34d399;
}

.bg-green-300 {
  background-color: #34d399;
}
//components/HeroSection.js
export default function HeroSection() {
  return (
    <section className="bg-gradient-to-r from-blue-600 via-blue-500 to-indigo-500 h-screen flex items-center justify-between px-8 sm:px-16">
      {/* Left Section */}
      <div className="text-left max-w-xl space-y-6">
        <div className="inline-block bg-indigo-800 text-white py-2 px-4 rounded-lg text-sm font-semibold tracking-wide">
          Three 90 Challege is live, hurry up!
        </div>
        <h1 className="text-5xl sm:text-6xl lg:text-7xl font-bold text-white">
          The Future of <br />
          <span className="text-green-300">Learning</span> <br />
          with XYZ Company.
        </h1>
        <p className="text-white text-base sm:text-lg font-light max-w-md">
          Join over 46,000+ students mastering skills like DSA, Web Development,
          DevOps, and more with XYZ Company. Start your learning journey today.
        </p>
        <button className="bg-green-300 text-gray-800 px-6 py-3 text-lg font-medium rounded-lg shadow-lg hover:bg-green-400 transition ease-in-out duration-200">
          Get Started
        </button>
      </div>

      {/* Right Section - Image */}
      <div className="hidden lg:block">
        <img
          src="/main.jpg"
          alt="Courses illustration"
          className="w-[450px] h-[450px] object-contain"
        />
      </div>
    </section>
  );
}
//page.js
import HeroSection from './components/HeroSection';

export default function Home() {
  return (
    <>
      <HeroSection />
    </>
  );
}
Now, type the below command to run the application.
npm run devOutput: To see output, open localhost:3000 in your system.