A pricing table is an essential part of any product or service-based website to show different plans or packages for users to choose from. In this article, we will help you implement a simple, responsive pricing table with three plans: Basic, Advanced, and Premium.
Output Preview: Let us have a look at how the final output will look like

Prerequisites
Approach to Create Pricing Table
- Set up the Next.js project with Tailwind CSS for styling.
- Create a reusable component PricingTable.js inside the components folder.
- The component will take a plans prop, which will be an array of objects representing different pricing plans. Each object will include details like plan name, price, features, and button text.
- In the parent component (e.g., index.js), create an array of plans where each object represents a pricing plan.
- Pass this plans array to the PricingTable component as props.
- Use Tailwind CSS to structure the pricing table in a responsive grid format. Each pricing plan will be displayed as a card containing a title, price, list of features, and a "Buy Now" button.
- Tailwind CSS utility classes will be used to handle layout, spacing, colors, borders, and hover effects.
Steps To Create The Pricing Table
Step 1: Create the NextJs App using the following command.
npx create-next-app@latest pricing-table
cd pricing-table
Configuration which you should follow while creating the App :
√ Would you like to use TypeScript? ... No / Yes
√ Would you like to use ESLint? ... No / Yes
√ Would you like to use Tailwind CSS? ... No / Yes
√ Would you like to use `src/` directory? ... No / Yes
√ Would you like to use App Router? (recommended) ... No / Yes
√ Would you like to customize the default import alias (@/*)? ... No / Yes
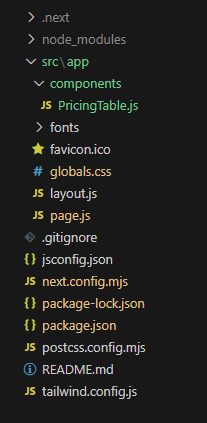
Project Structure
Updated Dependencies
"dependencies": {
    "next": "14.2.14",
    "react": "^18",
    "react-dom": "^18",
  },
  "devDependencies": {
    "postcss": "^8",
    "tailwindcss": "^3.4.1"
  }
}
Example: In this example, we will write the following code in different files(The name of the files is mentioned in the first line of each code block).
/* globals.css */

@tailwind base;
@tailwind components;
@tailwind utilities;

:root {
    --background: #ffffff;
    --foreground: #171717;
}

@media (prefers-color-scheme: dark) {
    :root {
        --background: #0a0a0a;
        --foreground: #ededed;
    }
}

body {
    color: var(--foreground);
    background: var(--background);
    font-family: Arial, Helvetica, sans-serif;
}

@layer utilities {
    .text-balance {
        text-wrap: balance;
    }
}
// page.js

import PricingTable from './components/PricingTable';

export default function Home() {
    const pricingPlans = [
        {
            name: 'Basic DSA',
            price: 500,
            features: [
                'Introduction to Data Structures',
                'Basic Algorithms (Sorting, Searching)',
                'Weekly Assignments',
                'Certificate on Completion',
            ],
            colorClass: 'text-blue-600',
            buttonClass: 'bg-blue-600',
            hoverClass: 'bg-blue-700',
            isHighlighted: false,
        },
        {
            name: 'Advanced DSA',
            price: 1000,
            features: [
                'All Basic DSA Features',
                'Advanced Algorithms (Graphs, DP)',
                'Data Structures (Trees, Heaps)',
                '2 Personal Doubt Sessions',
                'Limit up to 2 users',
            ],
            colorClass: 'text-yellow-500',
            buttonClass: 'bg-yellow-500',
            hoverClass: 'bg-yellow-600',
            isHighlighted: true,
        },
        {
            name: 'Premium DSA',
            price: 1600,
            features: [
                'All Advanced DSA Features',
                'Mock Coding Interviews',
                'Placement Assistance',
                '4 Personal Doubt Sessions',
                'Limit up to 4 users',
            ],
            colorClass: 'text-green-600',
            buttonClass: 'bg-green-600',
            hoverClass: 'bg-green-700',
            isHighlighted: false,
        },
    ];

    return (
        <div>
            <PricingTable plans={pricingPlans} />
        </div>
    );
}
// PricingTable.js

const PricingTable = ({ plans }) => {
    return (
        <div className="min-h-screen flex justify-center items-center bg-gray-100">
            <div className="w-full max-w-6xl mx-auto py-12 px-6">
                <h2 className="text-3xl font-bold text-center text-green-600
                mb-10">Welcome to GeeksForGeeks</h2>
                <h2 className="text-3xl font-bold text-center mb-10">
                Select Your Plan</h2>
                <p className="text-center text-gray-600 mb-8">
                DSA Self Placed Course: Beginner to Advance</p>

                <div className="grid grid-cols-1 md:grid-cols-3 gap-8">
                    {plans.map((plan, index) => (
                        <div key={index} className={`bg-white rounded-lg
                        shadow-lg p-6 text-center ${plan.isHighlighted ? 'border-2
                        border-yellow-500' : ''}`}>
                            <h3 className="text-2xl font-bold mb-4">{plan.name}
                            </h3>
                            <p className={`text-4xl font-bold mb-6
                            ${plan.colorClass}`}>
                            ₹ {plan.price}/month</p>
                            <ul className="text-gray-700 space-y-4 mb-6">
                                {plan.features.map((feature, idx) => (
                                    <li key={idx}>{feature}</li>
                                ))}
                            </ul>
                            <button className={`${plan.buttonClass}
                            text-white py-2 px-4 rounded-full hover:${plan.hoverClass}`}
                            > Buy Now
                            </button>
                        </div>
                    ))}
                </div>
            </div>
        </div>
    );
};

export default PricingTable;
To run your project use the below command.
npm run devOutput: