Showing posts with label TensorFlow. Show all posts
Showing posts with label TensorFlow. Show all posts
Saturday, December 18, 2021
TensorFlow.js Node on Docker and Kubernetes
I explain how to dockerize TensorFlow.js Node app and also run it on Kubernetes. This work was done as part of our open-source MLOps solution Skipper.
Sunday, December 12, 2021
TensorFlow.js Microservice
Do you know you could run TensorFlow.js on backend with Node.js? I explain how to build microservice with TensorFlow.js based on sample MobileNet model for image classification. I'm using Skipper Lib JS lib to communicate to RabbitMQ and receive/deliver events. You will learn about the code structure, which can be used as a blueprint for your own JS microservice implementations.
Monday, August 30, 2021
TensorFlow.js Setup for React JS App (Manning liveProject)
I explain the structure of my liveProject. It is a series of five projects, I use the first one as an example (it is free). React is highly prized by developers for its ease of building simple and intuitive frontends. liveProject teaches how to use Machine Learning directly within React code and run it in the browser. After working on this liveProject, you will learn how to run PoseNet model, use data collected by PoseNet to train your own custom ML model with TensorFlow.js. React application will help to track physical workout movements, classify them and count statistics.
Monday, July 26, 2021
Hugging Face Course and Pretrained Model Fine-Tuning
Hugging Face team recently released an online course about transformers, pretrained model fine-tuning, and sharing models on the Hugging Face hub. I went through the first part of the course related to model fine-tuning. I explain what changes I did for my previous sample related to Hugging Face model fine-tuning, based on knowledge learned from this course.
Wednesday, July 14, 2021
TensorFlow Decision Forests Example
With TensorFlow Decision Forests we can handle structured data without much preprocessing. There is no need to normalize numeric values, one-hot encode categorical values, or set magic values to replace missing data. I give it a try and run this new feature of TensorFlow in this video. The demo is based on the Titanic dataset taken from Kaggle.
Monday, June 7, 2021
ML Pipeline End-to-End Solution
Are you interested to learn how to build and run a complete ML pipeline - Web API, data processing, model training, and prediction services? In this video, I explain how the end-to-end solution works using our open-source product Skipper.
Sunday, March 7, 2021
TensorFlow.js Blueprint App Step by Step
I describe how to prepare data that comes from API into TensorFlow.js Dataset structure, how to shuffle, normalize, one-hot-encode, and batch the data. Next, I go on model training and explain why fitDataset is recommended way to train a neural network in TensorFlow.js. At last, I show how to do inference and print the results. This app is built with React, but the same code can be reused with any JS toolkit/framework.
Saturday, February 20, 2021
React and TensorFlow.js
I explain how to create React app with Yarn and how to integrate TensorFlow.js into that app. A simple model is trained with TensorFlow.js to give you a good starting point. I also show how to run the predict function and read the output.
Tuesday, December 24, 2019
Publishing Keras Model API with TensorFlow Serving
Building a ML model is a crucial task. Running ML model in production is not a less complex and important task. I had a post in the past about serving ML model through Flask REST API — Publishing Machine Learning API with Python Flask. While this approach works, it certainly lacks some important points:
TensorFlow comes with a set of tools to help you run ML model in production. One of these tools — TensorFlow Serving. There is an excellent tutorial that describes how to configure and run it — TensorFlow Serving with Docker. I will follow the same steps in my example.
Read more in my Towards Data Science post.
- Model versioning
- Request batching
- Multithreading
TensorFlow comes with a set of tools to help you run ML model in production. One of these tools — TensorFlow Serving. There is an excellent tutorial that describes how to configure and run it — TensorFlow Serving with Docker. I will follow the same steps in my example.
Read more in my Towards Data Science post.
Thursday, October 31, 2019
Getting Your Hands Dirty with TensorFlow 2.0 and Keras API
Diving into technical details of the regression model creation with TensorFlow 2.0 and Keras API. In TensorFlow 2.0, Keras comes out of the box with TensorFlow library. API is simplified and more convenient to use.

Read the complete article here.

Read the complete article here.
Monday, September 23, 2019
Comprehensive TensorFlow.js Example
I have implemented an app which includes TensorFlow.js API usage. First I will walk you through the app functionality and then will dive into implementation details. This app implements a business report execution time prediction use case (this time in JavaScript), which was explained in my previous post — Report Time Execution Prediction with Keras and TensorFlow.
Read more in my Towards Data Science post.

Read more in my Towards Data Science post.

Thursday, August 1, 2019
Report Time Execution Prediction with Keras and TensorFlow
The aim of this post is to explain Machine Learning to software developers in hands-on terms. Model is based on a common use case in enterprise systems — predicting wait time until the business report is generated.
Report generation in business applications typically takes time, it can be from a few seconds to minutes. Report generation requires time, because typically it would fetch and process many records, this process needs time. Users often get frustrated, they don’t know how long to wait until the report is finished and may go away by closing browser, etc. If we could inform user, before submitting the report request — how it long it will take to execute it, this would be great usability improvement.
I have implemented Machine Learning model using Keras regression to calculate expected report execution time, based on training data (logged information from the past report executions). Keras is a library which wraps TensorFlow complexity into simple and user-friendly API.
Python source code and training data is available on my GitHub repo. This code is based on Keras tutorial.
Monday, July 30, 2018
Text Classification with Deep Neural Network in TensorFlow - Simple Explanation
Text classification implementation with TensorFlow can be simple. One of the areas where text classification can be applied - chatbot text processing and intent resolution. I will describe step by step in this post, how to build TensorFlow model for text classification and how classification is done. Please refer to my previous post related to similar topic - Contextual Chatbot with TensorFlow, Node.js and Oracle JET - Steps How to Install and Get It Working. I would recommend to go through this great post about chatbot implementation - Contextual Chatbots with Tensorflow.
Complete source code is available in GitHub repo (refer to the steps described in the blog referenced above).
Text classification implementation:
Step 1: Preparing Data


Complete source code is available in GitHub repo (refer to the steps described in the blog referenced above).
Text classification implementation:
Step 1: Preparing Data
- Tokenise patterns into array of words
- Lower case and stem all words. Example: Pharmacy = pharm. Attempt to represent related words
- Create list of classes - intents
- Create list of documents - combination between list of patterns and list of intents
Python implementation:

Step 2: Preparing TensorFlow Input
- [X: [0, 0, 0, 1, 0, 1, 0, 1, 0, 0, 0, 0, 0, 1, ...N], Y: [0, 0, 1, 0, 0, 0, ...M]]
- [X: [0, 1, 0, 0, 0, 1, 0, 0, 0, 0, 1, 0, 1, 0, ...N], Y: [0, 0, 0, 1, 0, 0, ...M]]
- Array representing pattern with 0/1. N = vocabulary size. 1 when word position in vocabulary is matching word from pattern
- Array representing intent with 0/1. M = number of intents. 1 when intent position in list of intents/classes is matching current intent
Python implementation:

Step 3: Training Neural Network
- Use tflearn - deep learning library featuring a higher-level API for TensorFlow
- Define X input shape - equal to word vocabulary size
- Define two layers with 8 hidden neurones - optimal for text classification task (based on experiments)
- Define Y input shape - equal to number of intents
- Apply regression to find the best equation parameters
- Define Deep Neural Network model (DNN)
- Run model.fit to construct classification model. Provide X/Y inputs, number of epochs and batch size
- Per each epoch, multiple operations are executed to find optimal model parameters to classify future input converted to array of 0/1
- Batch size
- Smaller batch size requires less memory. Especially important for datasets with large vocabulary
- Typically networks train faster with smaller batches. Weights and network parameters are updated after each propagation
- The smaller the batch the less accurate estimate of the gradient (function which describes the data) could be
Python implementation:

Step 4: Initial Model Testing
- Tokenise input sentence - split it into array of words
- Create bag of words (array with 0/1) for the input sentence - array equal to the size of vocabulary, with 1 for each word found in input sentence
- Run model.predict with given bag of words array, this will return probability for each intent
Python implementation:

Step 5: Reuse Trained Model
- For better reusability, it is recommended to create separate TensorFlow notebook, to handle classification requests
- We can reuse previously created DNN model, by loading it with TensorFlow pickle
Python implementation:

Step 6: Text Classification
- Define REST interface, so that function will be accessible outside TensorFlow
- Convert incoming sentence into bag of words array and run model.predict
- Consider results with probability higher than 0.25 to filter noise
- Return multiple identified intents (if any), together with assigned probability
Python implementation:

Tuesday, July 10, 2018
Contextual Chatbot with TensorFlow, Node.js and Oracle JET - Steps How to Install and Get It Working
Blog reader was asking to provide a list of steps, to guide through install and run process for chatbot solution with TensorFlow, Node.JS and Oracle JET.
Resources:
1. Chatbot UI and context handling backend implementation - Machine Learning Applied - TensorFlow Chatbot UI with Oracle JET Custom Component
2. Classification implementation - Classification - Machine Learning Chatbot with TensorFlow
3. TensorFlow installation - TensorFlow - Getting Started with Docker Container and Jupyter Notebook
4. Source code - GitHub
Install and run steps:
1. Download source code from GitHub repository:

2. Install TensorFlow and configure Flask (TensorFlow Linear Regression Model Access with Custom REST API using Flask)
3. Upload intents.json file to TensorFlow root folder:

4. Upload both TensorFlow notebooks:

5. Open and execute (click Run for each section, step by step) model notebook:

6. Repeat training step few times, to get minimum loss:

7. Open and execute response notebook:

8. Make sure REST interface is running, see message below:

9. Test classification from external REST client:

10. Go to socketioserver folder and run (install Node.js before that) npm install express --save and npm install socket.io --save commands:

11. Run npm start to startup Node.js backend:

12. Go to socketiojet folder and run (install Oracle JET before that) ojet restore:
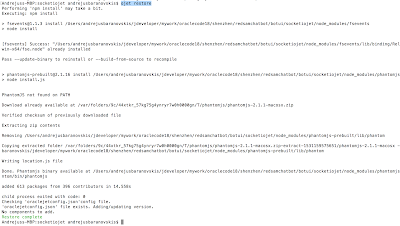
13. Run ojet serve to start chatbot UI. Type questions to chatbot prompt:

Resources:
1. Chatbot UI and context handling backend implementation - Machine Learning Applied - TensorFlow Chatbot UI with Oracle JET Custom Component
2. Classification implementation - Classification - Machine Learning Chatbot with TensorFlow
3. TensorFlow installation - TensorFlow - Getting Started with Docker Container and Jupyter Notebook
4. Source code - GitHub
Install and run steps:
1. Download source code from GitHub repository:

2. Install TensorFlow and configure Flask (TensorFlow Linear Regression Model Access with Custom REST API using Flask)
3. Upload intents.json file to TensorFlow root folder:

4. Upload both TensorFlow notebooks:

5. Open and execute (click Run for each section, step by step) model notebook:

6. Repeat training step few times, to get minimum loss:

7. Open and execute response notebook:

8. Make sure REST interface is running, see message below:

9. Test classification from external REST client:

10. Go to socketioserver folder and run (install Node.js before that) npm install express --save and npm install socket.io --save commands:

11. Run npm start to startup Node.js backend:
12. Go to socketiojet folder and run (install Oracle JET before that) ojet restore:

13. Run ojet serve to start chatbot UI. Type questions to chatbot prompt:

Monday, June 11, 2018
Machine Learning Applied - TensorFlow Chatbot UI with Oracle JET Custom Component
This post is based on Oracle Code 2018 Shenzhen, Warsaw and Berlin talks. View presentation on SlideShare:
In my previous post I have outlined how to build chatbot backend with TensorFlow - Classification - Machine Learning Chatbot with TensorFlow. Today post is the next step - I will explain how to build custom UI on top of TensorFlow chatbot with Oracle JET.
You can download complete source code (which includes TensorFlow part, backend for chatbot context processing and JET custom component chatbot UI) from my GitHub repository.
Here is solution architecture snapshot:

TensorFlow is used for machine learning and text classification task. Flask allows to communicate through REST to TensorFlow from outside. Contextual chatbot conversation processing is implemented in Node.js backend, communication with Oracle JET client is handled by Socket.io.
Key point in chatbot implementation - correct data structure construction for machine training process. More accurate learning will be, better classification results will be achieved afterwards. Chatbot training data can come in the form of JSON. Training data quality can be measured by overlap between intents and sample sentences. As more overlaps you have, weaker machine learning output will be produced and classification will be less accurate. Training data can contain information which is not used directly by TensorFlow - we can include intent context processing into the same structure, it will be used by context processing algorithm. Sample JSON structure for training data:

Accurate classification by TensorFlow is only one piece of chatbot functionality. We need to maintain conversation context. This can be achieved in Node.js backend, by custom algorithm. In my example, when context is not set - TensorFlow is called to classify statement and produce intent probability. There might be multiple intents classified for the same sentence - TensorFlow will return multiple probabilities. It is up to you, either to always choose intent with top probability or ask user to choose. Communication back to the client is handled through Socket.io by calling socket.emit function:

If context was already set, we don't call classification function - we don't need it in this step. Rather we check by intent context mapping - what should be the next step. Based on that information, we send back question or action to the client, again through Socket.io by calling socket.emit function:

Chatbot UI is implemented with JET custom component (check how it works in JET cookbook). This makes it easy to reuse the same component in various applications:

Here is example, when chatbot UI is included into consuming application. It comes with custom listener, where any custom actions are executed. Custom listener allows to move any custom logic outside of chatbot component, making it truly reusable:

Example for custom logic - based on chatbot reply, we can load application module, assign parameter values, etc.:

Chatbot UI implementation is based on the list, which renders bot and client messages using the template. This template detects if message belongs to client or bot and applies required style - this helps to render readable list. Also there is input area and control buttons:

JS module executes logic which helps to display bot message, by adding it to the list of messages generates event to be handled by custom logic listener. Message is sent from the client to the bot server by calling Socket.io socket.emit function:

Here is the final result - chatbot box implemented with Oracle JET:

Tuesday, April 3, 2018
Comparing Intent Classification in TensorFlow and Oracle Chatbot
I have created sample set of intents with phrases (five phrases per intent, and ten intents). Using this set of data to train and build classification model with TensorFlow and Oracle Chatbot machine learning. Once model is trained, classifying identical sample phrases with both TensorFlow and Oracle Chatbot to compare results. Using Oracle Chatbot with both Linguistic and Machine Learning models.
Summary:
1. Overall TensorFlow model performs better. The main reason for this - I was training TensorFlow model multiple times, until good learning output (minimized learning loss) was produced.
2. Oracle Chatbot doesn't return information about learning loss after training, this makes it hard to decide if training was efficient or no. As consequence - worse classification results, can be related to slightly less efficient training, simply because you don't get information about training efficiency
3. Classification results score: 93% TensorFlow, 87% Oracle Chatbot Linguistic model, 67% Oracle Chatbot Machine Learning. TensorFlow is better, but Oracle Chatbot Linguistic model is very close. Oracle Chatbot Machine Learning model can be improved, see point 2
Results table (click on it, to see maximized):

TensorFlow
List of intents for TensorFlow is provided in JSON file. Same intents are used to train model in Oracle Chatbot:

TensorFlow classification model is created by training 2-layer neural network. Once training is completed, it prints out total loss for the training. This allows to repeat training, until model is produced with optimal loss (as close as possible to 0): 0.00924 in this case:

TensorFlow classification result is good, it failed to classify only one sentence - "How you work?" This sentence is not directly related to any intent, although I should mention Oracle Chatbot Linguistic model is able to classify it. TensorFlow offers correct classification intent as second option, coming very close to correct answer:

Oracle Chatbot
Oracle Chatbot provides UI to enter intents and sample phrases - same set of intents with phrases is used as for TensorFlow:

Oracle Chatbot offers two training models - linguistic and machine learning based.

Once model is trained, there is no feedback about training loss. We can enter phrase and check intent classification result. Below is sample for Linguistic model classification failure - it fails to classify one of the intents, where sentence topic is not perfectly clear, however same intent is classified well by Oracle Chatbot Machine Learning model:

Oracle Chatbot Machine Learning model fails on another intent, where we want to check for hospital (hospital search) to monitor blood pressure. I'm sure if it would be possible to review training quality loss (may be in the next release?), we could decide to re-train model and get results close to TensorFlow. Classification with Oracle Chatbot Machine Learning model:

Saturday, March 3, 2018
Classification - Machine Learning Chatbot with TensorFlow
Visual conversation flow is a first thing to create, when you want to build chatbot. Such flow will help to define proper set of intents along with dialog path. Otherwise it is very easy to get lost in conversation transitions and this will lead to chatbot implementation failure. Our chatbot for medical system doesn't make any decisions, instead it helps user to work with enterprise system. It gets user input and during conversation leads to certain API call - which at the end triggers enterprise system to execute one or another action. If user is looking for patient blood pressure results, chatbot will open blood pressure module with patient ID. If user wants to edit or review blood pressure results in general, chatbot will load blood pressure results module without parameters. This kind of chatbot is very helpful in large and complex enterprise systems, this helps to onboard new users much quicker without extra training for system usage. Example of visual conversation flow for chatbot:

Conversation intents can be logged in JSON file. Where you should list conversation patterns mapped with tags, responses and contextual information. Chatbot is not only about machine learning and user input processing, very important is to handle conversation contextual flow and usually this is done outside of machine learning area in another module. We will look into it later. Machine learning with neural network is responsible to allow chatbot to calculate tag probability based on user input. In other words - machine learning helps to bring the best matching tag for current sentence, based on predefined intents patterns. As long as we get probability for the intent tag - we know what user wants, we can set conversation context and in the next user request - react based on current context:

TensorFlow runs neural network, which trains on supplied list of intents. Each training run may produce different learning results, you should check total loss value - lower value, better learning result. Probably you will run training multiple times to get optimal learning model:

TensorFlow can save learned model to be reusable by classification API. REST interface which calls classification API is developed as separate TensorFlow module. REST is handled by Flask library installed into TensorFlow runtime:

Classification function gets user input from REST call and runs it through TensorFlow model. Results with higher probability than defined by threshold are collected into ordered array and returned back. We have classification function without REST annotation for local tests within TensorFlow runtime:

Let's see how classification works, result of classification will drive next action for the chatbot. Each classification request returns matched tag and probability. User input is not identical to the patterns defined in intents, thats why matching probability may differ - this is core part of machine learning. Neural network constructed with TensorFlow, based on learned model, assumes the best tag for current user input.
User input "Checking blood pressure results for patient". This input can be related to both tags blood_pressure_search and blood_pressure, but classification decides higher probability for the first option, and this is correct. Similar for user input "Any recommendations for adverse drugs?":

Through REST endpoint we can call classification function outside of TensorFlow environment. This will allows us to maintain conversation context outside TensorFlow:

Useful resources:
- TensorFlow notebooks and intents JSON are available on GitHub repository.
- Excellent article about Contextual Chatbots with TensorFlow
- My previous post about Red Samurai chatbot
Sunday, February 4, 2018
Say Hello to Red Samurai Contextual Chatbot with TensorFlow Deep Neural Network Learning
We are building our own enterprise chatbot. This chatbot helps enterprise users to run various tasks - invoice processing, inventory review, insurance cases review, order process - it will be compatible with various customer applications. Chatbot is based on TensorFlow Machine learning for user input processing. Machine learning helps to identify user intent, our custom algorithm helps to set conversation context and return response. Context gives control over sequence of conversations under one topic, allowing chatbot to keep meaningful discussion based on user questions/answers. UI part is implemented in two different versions - JET and ADF, to support integration with ADF and JET applications.
Below is the trace of conversations with chatbot:

User statement Ok, I would like to submit payment now sets context transaction. If word payment is entered in the context of transaction, payment processing response is returned. Otherwise if there is no context, word payment doesn't return any response. Greeting statement - resets context.
Intents are defined in JSON structure. List of intents is defined with patterns and tags. When user types text, TensorFlow Machine learning helps to identify pattern and it returns probabilities for matching tags. Tag with highest probability is selected, or if context was set - tag from context. Response for intent is returned randomly, based on provided list. Intent could be associated with context, this helps to group multiple related intents:

Contextual chatbot is implemented based on excellent tutorial - Contextual Chatbots with Tensorflow. Probably this is one of the best tutorials for chatbot based on TensorFlow. Our chatbot code follows closely ideas and code described there. You could run the same on your TensowFlow environment - code available on GitHub. You should run model first and then response Python notebooks.
Model notebook trains neural network to recognize intent patterns. We load JSON file with intents into TensorFlow:

List of intent patterns is prepared to be suitable to feed neural network. Patterns are translated into stemmed words:

Learning part is done with TensorFlow deep learning library - TFLearn. This library makes it more simple to use TensorFlow for machine learning by providing higher-level API. In particular for our chatbot we are using Deep Neural Network model - DNN:

Once training is complete and model is created, we can save it for future reuse. This allows to keep model outside of chatbot response processing logic and makes it easier to re-train model on new set of intents when required:

In response module, we load saved model back:

Function response acts as entry point to our chatbot. It gets user input and calls classify function. Classification function, based on learned model, returns list of suggested tags for identified intents. Algorithm locates intent by its tag and returns random reply from associated list of replies. If context based reply is returned, only if context was set previously:

Stay tuned for more blog posts on this topic.
Below is the trace of conversations with chatbot:

User statement Ok, I would like to submit payment now sets context transaction. If word payment is entered in the context of transaction, payment processing response is returned. Otherwise if there is no context, word payment doesn't return any response. Greeting statement - resets context.
Intents are defined in JSON structure. List of intents is defined with patterns and tags. When user types text, TensorFlow Machine learning helps to identify pattern and it returns probabilities for matching tags. Tag with highest probability is selected, or if context was set - tag from context. Response for intent is returned randomly, based on provided list. Intent could be associated with context, this helps to group multiple related intents:

Contextual chatbot is implemented based on excellent tutorial - Contextual Chatbots with Tensorflow. Probably this is one of the best tutorials for chatbot based on TensorFlow. Our chatbot code follows closely ideas and code described there. You could run the same on your TensowFlow environment - code available on GitHub. You should run model first and then response Python notebooks.
Model notebook trains neural network to recognize intent patterns. We load JSON file with intents into TensorFlow:

List of intent patterns is prepared to be suitable to feed neural network. Patterns are translated into stemmed words:

Learning part is done with TensorFlow deep learning library - TFLearn. This library makes it more simple to use TensorFlow for machine learning by providing higher-level API. In particular for our chatbot we are using Deep Neural Network model - DNN:

Once training is complete and model is created, we can save it for future reuse. This allows to keep model outside of chatbot response processing logic and makes it easier to re-train model on new set of intents when required:
In response module, we load saved model back:

Function response acts as entry point to our chatbot. It gets user input and calls classify function. Classification function, based on learned model, returns list of suggested tags for identified intents. Algorithm locates intent by its tag and returns random reply from associated list of replies. If context based reply is returned, only if context was set previously:

Stay tuned for more blog posts on this topic.
Subscribe to:
Posts (Atom)
